Family Joy Blog Linky Party #62

Spring break is almost here! Do you have any travel plans, or maybe you or planning a stay-cation? Of course I have a list of things I need to do and things I want to do, we’ll see which list wins 🙂
I have a few blog projects I’m working on and am excited to get all finished soon. Let’s see what you’ve all been working on this week. Remember to share and comment so we make this fun for everyone.

family joy blog linky parties

Party invite(4)


party hosts (2)
Charlene @ Thinking Outside The Pot: Facebook, Twitter, Instagram, Pinterest, Google +, Blog
Samantha @ Sammy Approves: Facebook, Twitter, Instagram, Pinterest, Google +, Blog
Cristina @ Ava’s Alphabet: Facebook, Twitter, Instagram, Pinterest, Google +, Blog
Charlotte @ Pursue Your Project: Facebook, Twitter, Instagram, Pinterest, Google +, Blog
Shamira @ Smiling Notes : Facebook, Twitter, Pinterest, Instagram, Blog
Melissa @ Mel Claire : Facebook, Pinterest, Twitter, Blog
Crystal @ Love Inspired Details : Facebook, Twitter, Pinterest, Instagram, Blog
Christene @ Keys To Inspiration : Facebook, Twitter, Pinterest, Instagram, Blog


recent joys #62


Thinking Outside The Pot: Autism 24/7 In Our House
Sammy Approves: How to: Raise Kids Who Love Our Earth
Ava’s Alphabet: Give The Give Of Reading with Personalized Children’s Books
Pursue Your Project: Instant Pot Chicken Corn Noodle Soup
Smiling Notes: Easy Meal Ideas: Tuna Salad Sandwich
Mel Claire: Instant Pot Slow Cooker Vegetable Beef Soup
Love Inspired: Diary Of An Foster Mom #2

Keys To Inspiration: DIY Geometric Floral Door Hanger


Features #62
My Husband Has Too Many Hobbies: Speckled Easter Eggs
The Jenny Evolution: Bunny Easter Rice Krispie Treats
The Cheerful Space: DIY Silk Tie Dyed Easter Eggs
Typically Simple: White Chocolate Oreo Bark
Embellishmints: Carrot Cake Muddy Buddies

Feathers in the Woods: How To Plant A Fairy Garden

Savvy Apron: Dresser Makeover with Shutters

Lolly Jane: Established Sign


most clicked link #62


——–Lolly Jane: Cheery Spring Wreaths——–


Thinking Outside The Pot
party rules


Save Save Save Save Save Save Save Save Save Save Save Save Save Save Save Save Save Save Save Save Save Save Save Save Save Save Save Save Save Save Save Save Save Save Save Save Save Save Save

Diary Of A Foster Mom #2


Journal Entry #2

As I sit here and write during nap time I can sigh with a sense of relief. A sense that prayer, love, patience and time can really work wonders.
Recently, our family has been going thru a major adjustment period. Everyone trying to abide by a new schedule, a new little addition running the flow of our family.

The last month I feel like my heart has been on a roller coaster ride of emotion. This what you go through classes for, to prepare you for the ride. But we all know getting trained for something and personally going through it can feel very different.
Without a doubt the best tip I would offer to someone is… allowance! There’s freedom in allowing yourself to feel your feelings. Maybe it sounds simple or silly but I often try to talk myself out of certain feelings. And in the end, it doesn’t really help.

There were days that I could feel each minute, you know that feeling when you just want to hit fast forward through the screaming or the battle of wills. Then there were days when time went by too quickly, and I felt like I didn’t get to give enough kisses and snuggles. Or too many new cute things happened too fast and none were on video!!

The sleepless nights, the crying, the ‘I don’t know how long this bonding thing is going to take’- it all comes together in a moment. A minute in time when you can sit down and see the fruits of your labor. When you can marvel across the room at the leaps and bounds this child has made in a small amount of time. The belly laugh you can’t control when he’s expressing his own sense of humor. When he smiles as you enter the room, or his face lights up when you’re laughing, and when his arms stretch out for you to hold him. These may be little things in this great big world but they are big things in our little world 🙂

Progress, time, commitment. Words I don’t really like to hear to be honest with you. Or really the “impatient” side of me doesn’t like to hear. Let’s be real, the good things, the sweet and savory remember forever- build your life around kinda things, people and moments all require the above 3 words- right?!

So here’s to reminding myself that patience and prayer are the best way to start and end each day.


Family Joy Blog Linky Party #61

Remember to share our link party and have share buttons are your site so we can share your posts 🙂 Let’s get started!


family joy blog linky parties

Party invite(4)


party hosts (2)
Charlene @ Thinking Outside The Pot: Facebook, Twitter, Instagram, Pinterest, Google +, Blog
Samantha @ Sammy Approves: Facebook, Twitter, Instagram, Pinterest, Google +, Blog
Cristina @ Ava’s Alphabet: Facebook, Twitter, Instagram, Pinterest, Google +, Blog
Charlotte @ Pursue Your Project: Facebook, Twitter, Instagram, Pinterest, Google +, Blog
Shamira @ Smiling Notes : Facebook, Twitter, Pinterest, Instagram, Blog
Melissa @ Mel Claire : Facebook, Pinterest, Twitter, Blog
Crystal @ Love Inspired Details : Facebook, Twitter, Pinterest, Instagram, Blog
Christene @ Keys To Inspiration : Facebook, Twitter, Pinterest, Instagram, Blog


recent joys #61

Thinking Outside The Pot: Frugal Easter Bunny Banner
Sammy Approves: How Dress Up Promotes Daily Creative
Ava’s Alphabet: DIY Carrot Wreath For Spring
Pursue Your Project: Our First Experience Incubating Hatching Eggs
Smiling Notes: Greek Yogurt Chocolate Mousse
Mel Claire: Delicious Shrimp Etouffee Recipe
Love Inspired: Cowboy Boots Desk Decor

Keys To Inspiration: Ideas For Grown Up Easter Baskets


Features #61

Across The Boulevard: Easy Bunny Craft
Typically Simple: Craft Sticks Flower Pots
Pillar Box Blue: Easy Paper Bunny Treat Bags For Easter
3 Boys & A Dog: 19 Chick-Fil-A Copycats You Can Make At Home
Typically Simple: Homemade Peanut Butter Eggs

The Kitchen: Roast Beef with a Sherry, Mushroom, Shallot Gravy

Sparkle Living Blog: Peeking Peeps Ice Cream Push Pops

Delightful E Made: Blueberry Tarts With Lemon Mascarpone Cream


most clicked link #61

——–Penny Pincher Jenny: Lemon Weight Watchers Muffins——–


Thinking Outside The Pot
party rules


Save Save Save Save Save Save Save Save Save Save Save Save Save Save Save Save Save Save Save Save Save Save Save Save Save Save Save Save Save Save Save Save Save Save Save Save Save Save Save

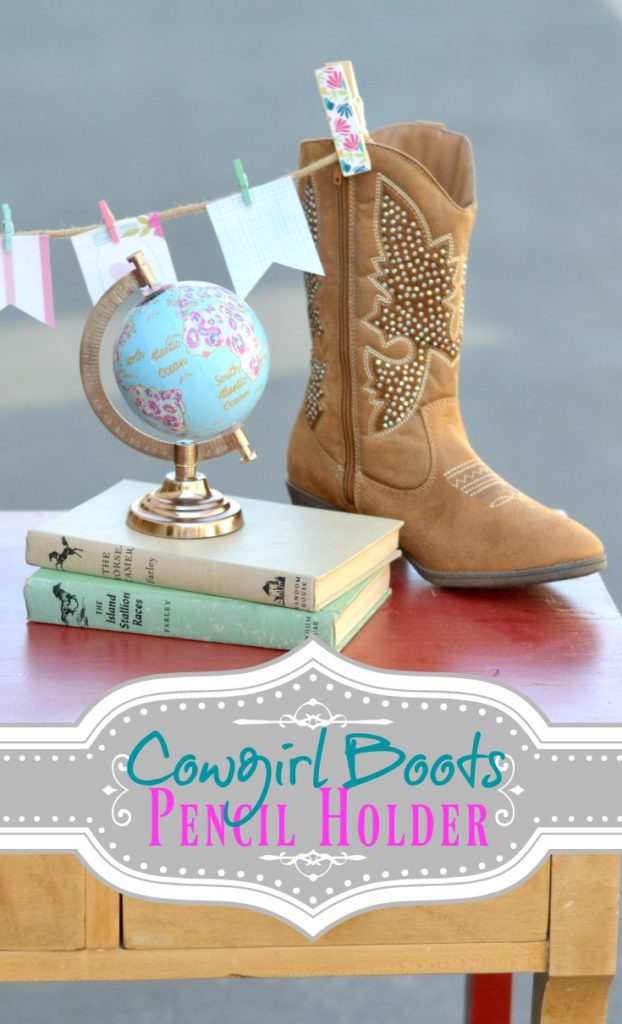
Cowgirl Boots Desk Decor

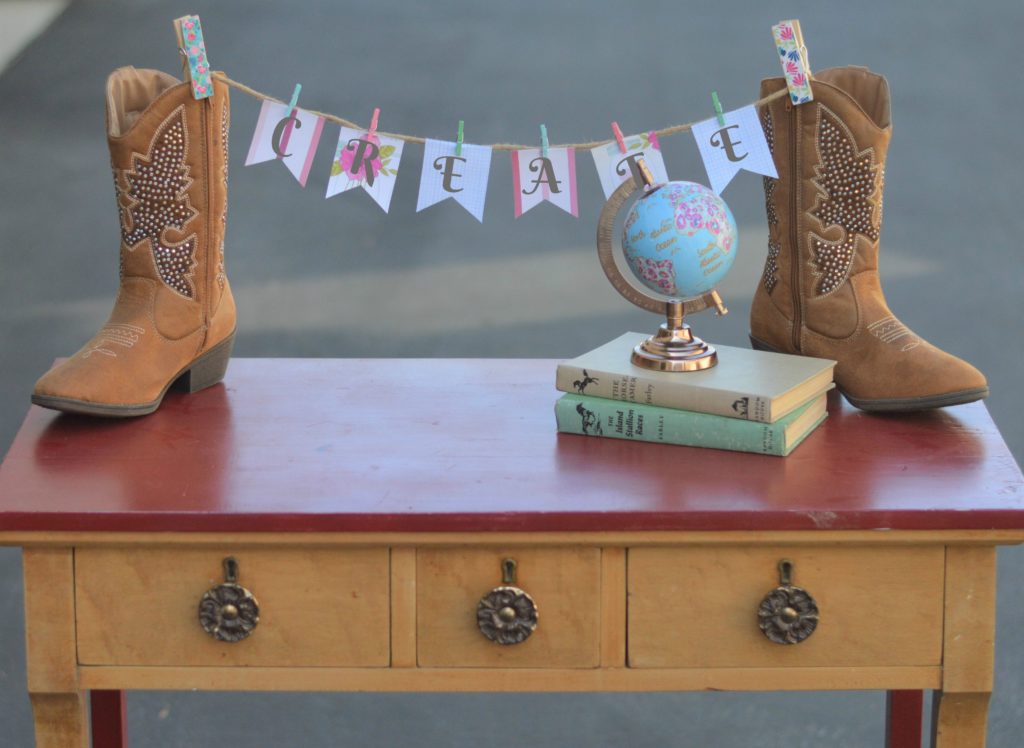
My daughter loves horses, loves the barn and getting all dressed up in her gear! So when I looking for a inspiration the past couple weeks I didn’t have to look farther than her cowgirl boots.

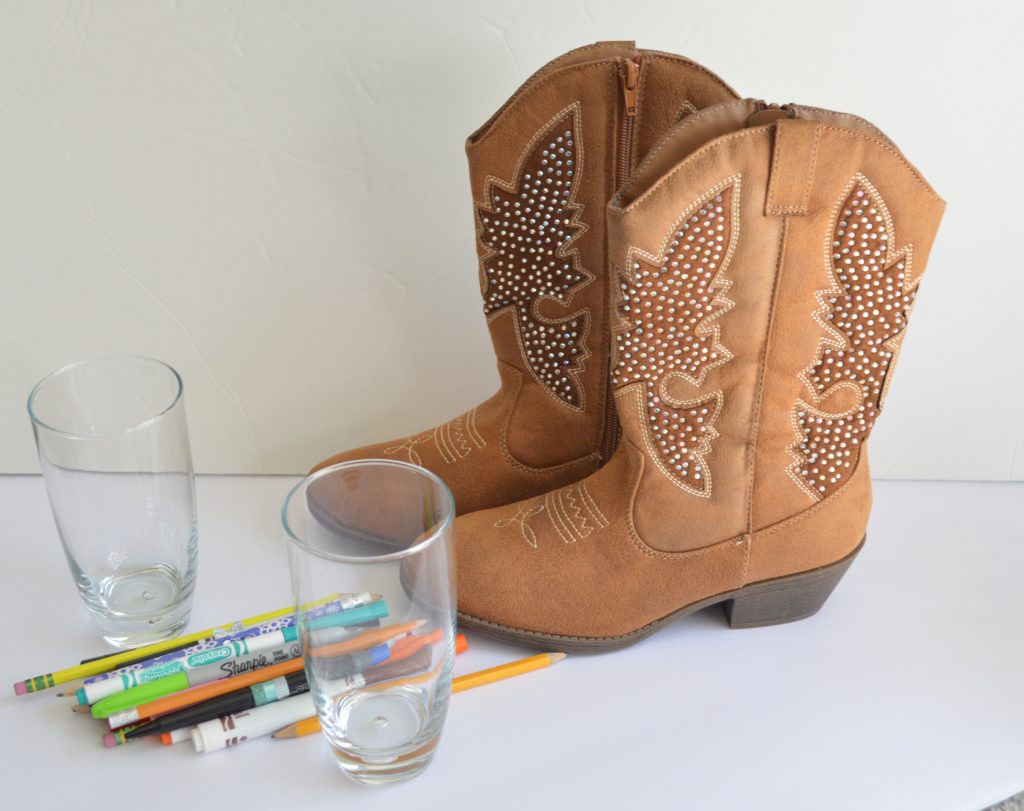
To create this look you’ll need:

*Cowgirl boots
*2 glass vases or heavy cups
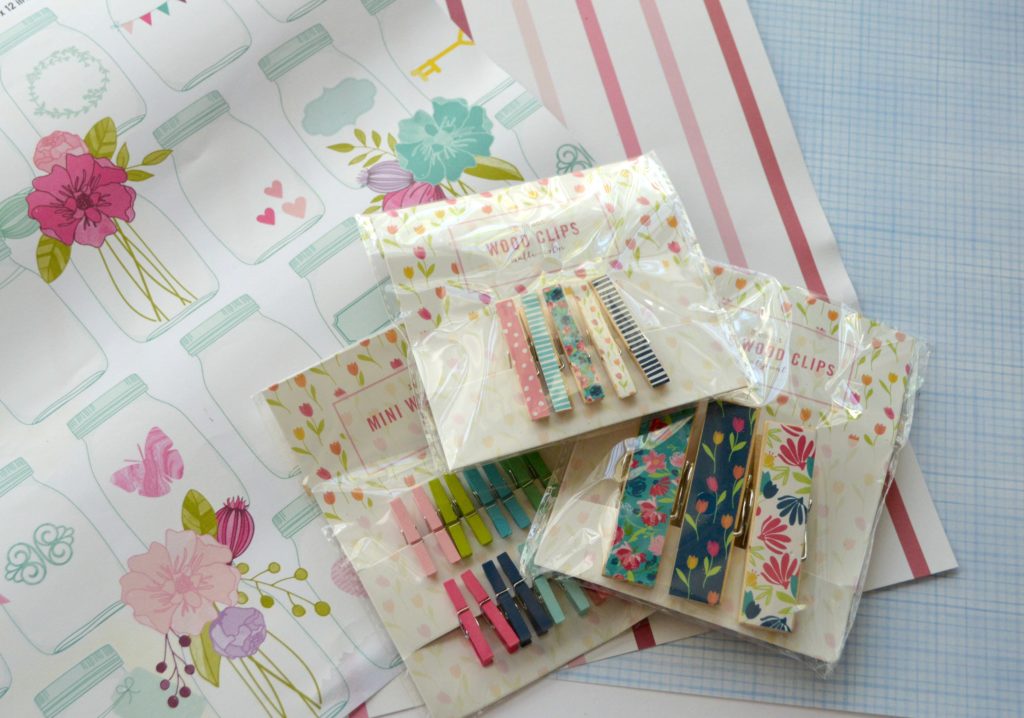
*Scrapbook paper
*Colorful clothes pins
*Twine

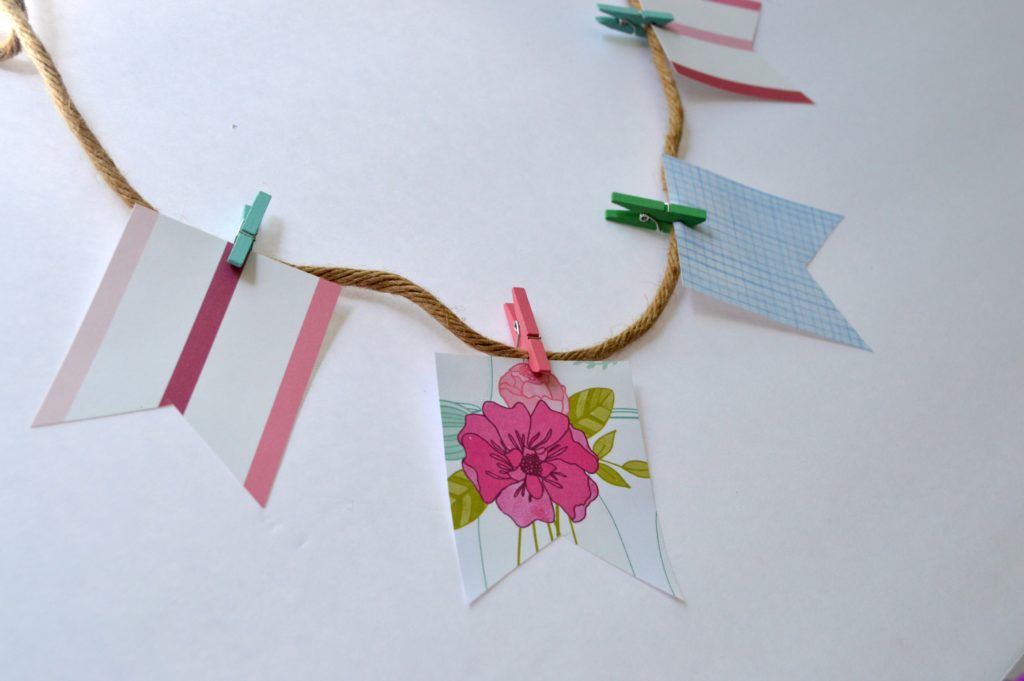
Start with some shabby chic scrapbook paper and cut some pendant shapes. Personally, I love the traditional pendant shape best. You will then use those clothespins to secure the paper pendants to the twine. A cute motivational word really hits home in my book.


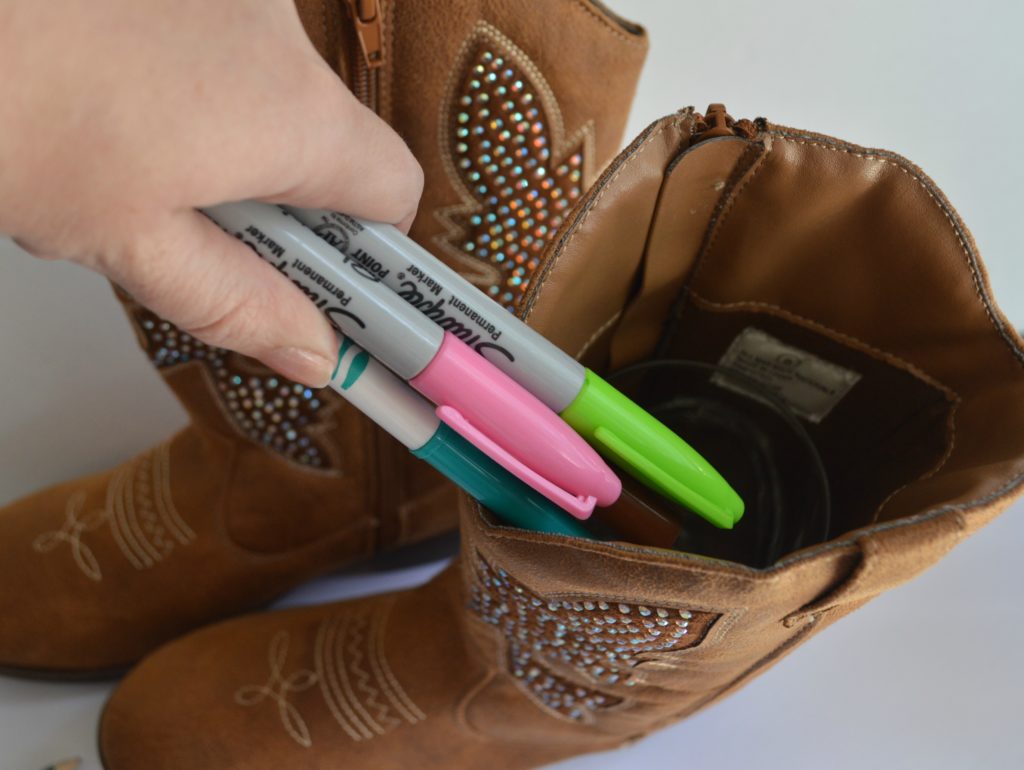
Next grab 2 glasses or vases. I had these 2 drinking glasses around and they were perfect. Nice and heavy on the bottom, because the boots will need to hold firm on each end. Of course the pens and markers will also add a little weight. Insert the glasses/vases into each boot- then add the pens and markers. I LOVE that the boots are tall enough to hide the mess.

Finally put it all together! Let’s be honest, make sure you have fun boots! I found some cute ones here. It will really set the tone for the top of your desk and I want to smile when I sit down 🙂


Family Joy Blog Linky Party #60

This week was filled with sports and activities, birthdays and cleaning- I am ready to relax 🙂 Excited to see what you all have been working on. Still working on Easter or thinking ahead to summer planning? Kids camps seem to be advertising everywhere and I need to start thinking of summer scheduling before everything fills up. I just want to get through the next 2 weeks first!

Onto our party, remember to comment and share!

Party invite(4)


party hosts (2)

Charlene @ Thinking Outside The Pot: Facebook, Twitter, Instagram, Pinterest, Google +, Blog
Samantha @ Sammy Approves: Facebook, Twitter, Instagram, Pinterest, Google +, Blog
Cristina @ Ava’s Alphabet: Facebook, Twitter, Instagram, Pinterest, Google +, Blog
Charlotte @ Pursue Your Project: Facebook, Twitter, Instagram, Pinterest, Google +, Blog

Shamira @ Smiling Notes : Facebook, Twitter, Pinterest, Instagram, Blog

Melissa @ Mel Claire : Facebook, Pinterest, Twitter, Blog

Crystal @ Love Inspired Details : Facebook, Twitter, Pinterest, Instagram, Blog

Christene @ Keys To Inspiration : Facebook, Twitter, Pinterest, Instagram, Blog


recent joys #60


Thinking Outside The Pot: Amazing Instant Pot Beef Stew
Sammy Approves: 20 Non-Candy Easter Basket Fillers
Ava’s Alphabet: Bunny Footprint Art
Pursue Your Project: An Instant Pot Recipe For Every Meal
Smiling Notes: 7 Smart Ways to Save Money Online

Mel Claire: French Spaghetti
Love Inspired: Dollar Store Easter Crafts

Keys To Inspiration: Fresh & Modern Powder Room Reveal


Features #60
Lolly Jane: Spring Easter Egg Sign Decor
Just Measuring Up: 12 Easter Crafts That You Can Make With The Same Bunny Template
The Scrap Shoppe Blog: Framed Paper Bunny
A Dish Of Daily Life: Sticky Honey Mustard Chicken
The Monday Box: Chocolate Covered Leap-Rechauns and Pots Of Gold For St. Patrick’s Day Military Care Package

The Lazy Gastronome: “Carrot” Eggs

Tired & True Blog: Faux Chalkboard Dog Leash Holder

Sparkle Living Blog: Springtime Painted Wooden Tulips


most clicked link #60


——–My Life From Home: Decorate Your Mantel: Spring——–


Thinking Outside The Pot
party rules


Save Save Save Save Save Save Save Save Save Save Save Save Save Save Save Save Save Save Save Save Save Save Save Save Save Save Save Save Save Save Save Save Save Save Save Save Save Save Save

Dollar Store Easter Crafts


How can you not love dollar store decorating… that doesn’t look like you only spent a dollar, right?! Here’s a few things I whipped up to add some Easter touches around the house.


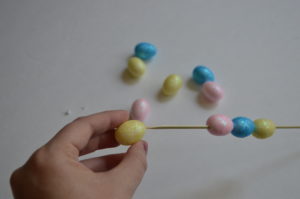
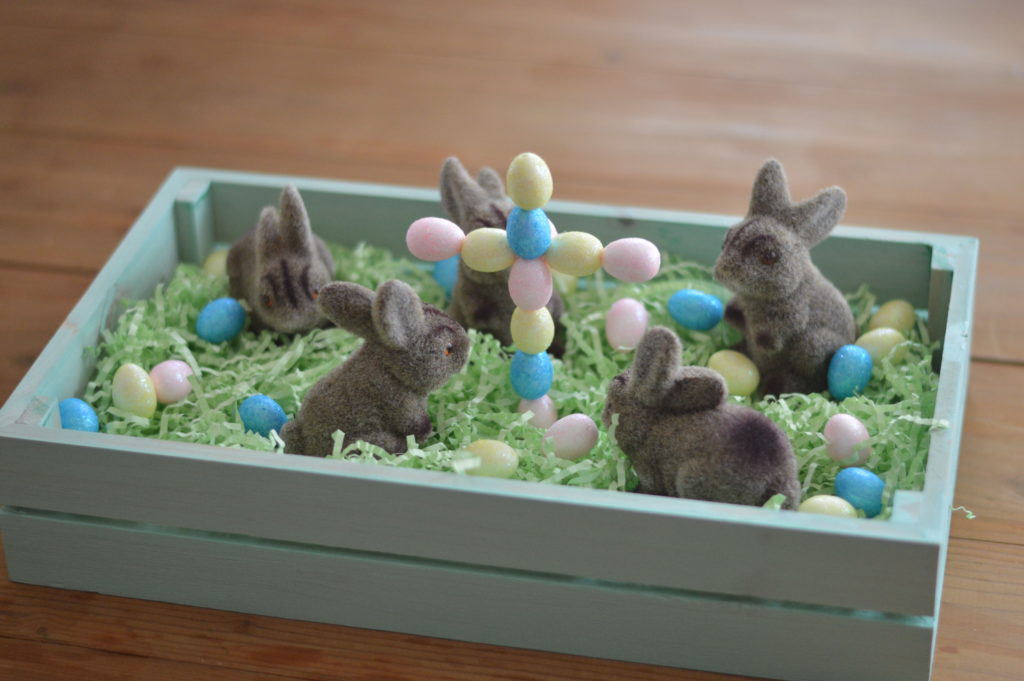
I knew exactly what I was looking for when I went to the store and the craziest thing- I actually found it!! I wanted little tiny eggs I could stack on skewers to make a cross. The glitter on the eggs was an added bonus. Notice the little bunnies are worshiping the cross 🙂

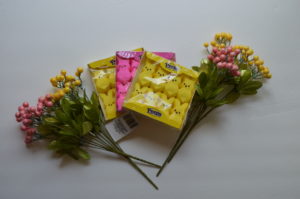
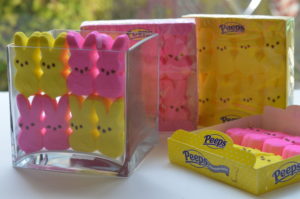
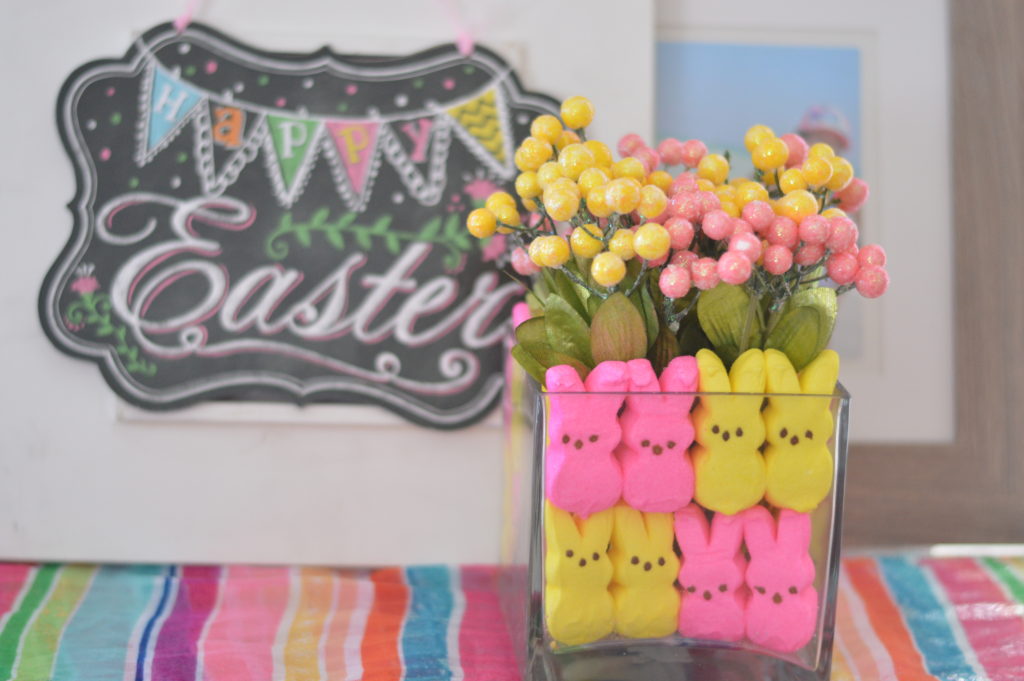
I thought my shelf needed some bright colors splashed in so I bought coordinating “flower balls” (do they have a real name, if so I have no idea what they’re really called). Layered my peeps, while smiling. Seriously, how can you not smile when you look at those cute ‘lil guys.

The Easter sign in the back and the striped scarf under the vase are also from the dollar store!

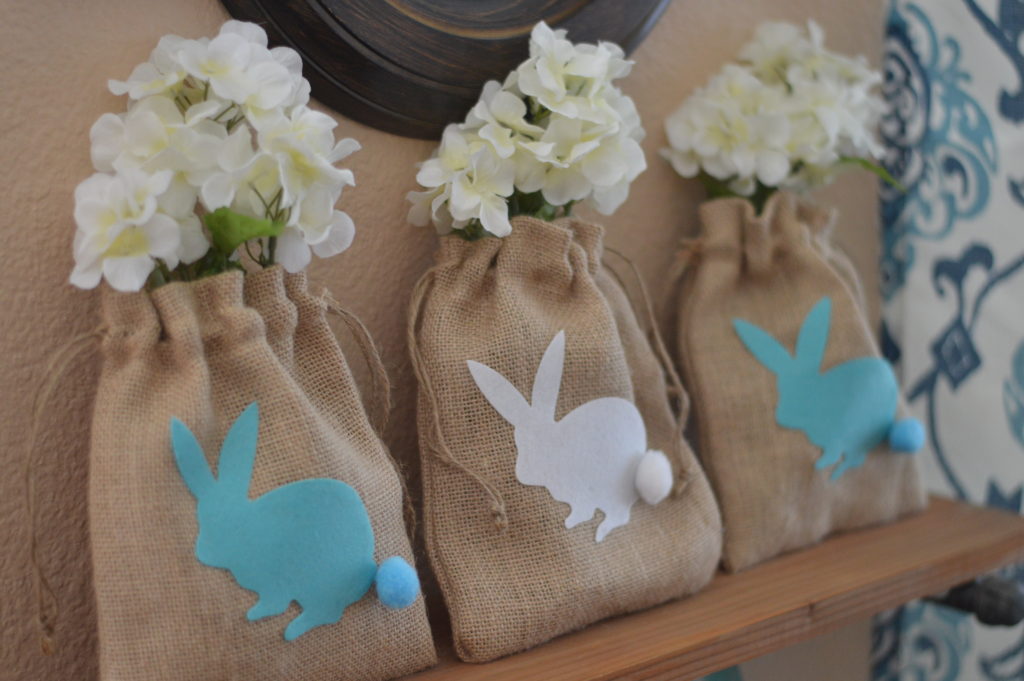
I knew when I saw these bags that they were a steal. I mean, really, only a dollar each! The hydrangeas I found amoung all the fake flowers at the dollar store too. I’m not a huge fan of fake flowers because, well… they usually all look fake! But if I buy fake flowers it’s usually hydrangeas because they look the most real 🙂

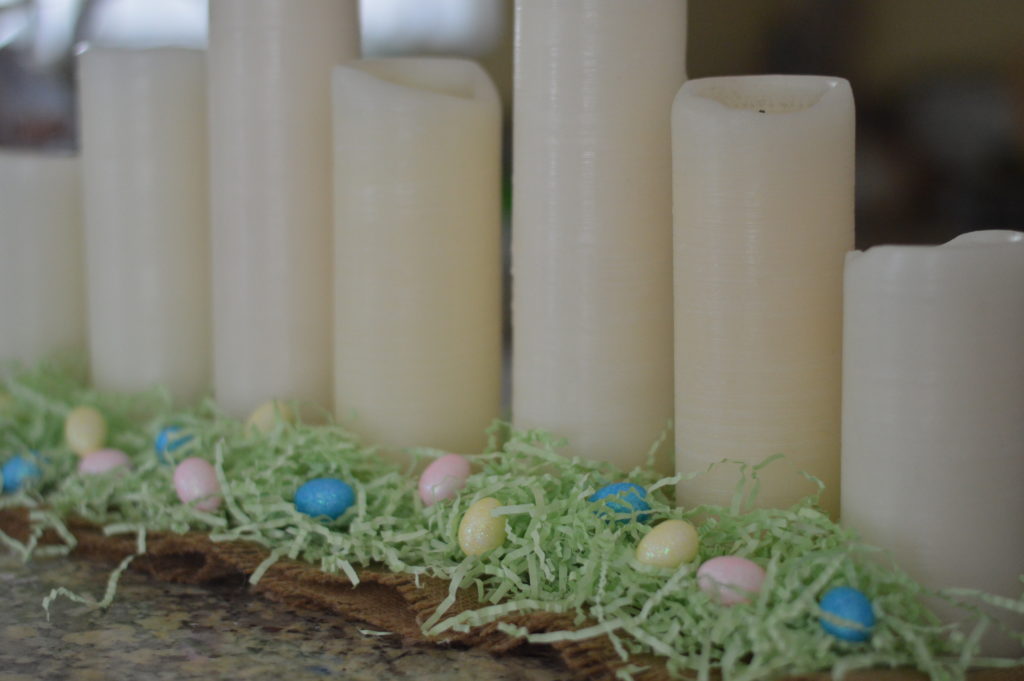
I have a pile of candles and I love that they are off white because that basically means they go with any design or color scheme. I had some left over Easter grass and eggs built a candle nest along my bar. Just a little touch but I really like the way it looks!

Happy Easter 🙂

Family Joy Blog Linky Party #59

family joy blog linky parties

Party invite(4)


party hosts (2)

Charlene @ Thinking Outside The Pot: Facebook, Twitter, Instagram, Pinterest, Google +, Blog
Samantha @ Sammy Approves: Facebook, Twitter, Instagram, Pinterest, Google +, Blog
Cristina @ Ava’s Alphabet: Facebook, Twitter, Instagram, Pinterest, Google +, Blog
Charlotte @ Pursue Your Project: Facebook, Twitter, Instagram, Pinterest, Google +, Blog

Shamira @ Smiling Notes : Facebook, Twitter, Pinterest, Instagram, Blog

Melissa @ Mel Claire : Facebook, Pinterest, Twitter, Blog

Crystal @ Love Inspired Details : Facebook, Twitter, Pinterest, Instagram, Blog

Christene @ Keys To Inspiration : Facebook, Twitter, Pinterest, Instagram, Blog


recent joys #59

Thinking Outside The Pot: Spring Into OshKosh B’gosh Style
Sammy Approves: 50 Reasons Clutter Doesn’t Make You a Failed Parent
Ava’s Alphabet: Chocolate Mint Brownie Trifle
Pursue Your Project: I See Me! Personalized Children’s Books
Smiling Notes: A Quick Lunch At Bub & Pop’s

Mel Claire: DIY Spring Wreath Tutorial
Love Inspired: DIY T-Shirt

Keys To Inspiration: DIY Modern Shiplap Wall Treatment


Features #59

Just Measuring Up: Building a Picnic Table in One Day
Lolly Jane: Cereal Box Succulent Planters
Sparkle Living: Kaleidoscope Easter Eggs
Back To The South: Chalkboard Pantry Door
My Suburban Kitchen: 10 Minute Thai Veggie Noodles

Eight Pepper Berries: Savory Rosemary Irish Soda Bread

Pale Blue Corner: Memory Quilt From Baby Clothes Part 2

The Cheerful Space: Step by Step Floral Painting


most clicked link #59

——–A Bride On A Budget: DIY Bridal Shower Soap Favor——–


Thinking Outside The Pot
party rules


Save Save Save Save Save Save Save Save Save Save Save Save Save Save Save Save Save Save Save Save Save Save Save Save Save Save Save Save Save Save Save Save Save Save Save Save Save Save Save

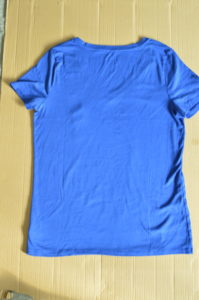
DIY T-Shirt

DIY easy to make t-shirt!

It’s finally here… baseball season. I love me a good baseball game, and I love to be dressed accordingly. So I wanted to craft up something cute to wear. When Target had their shirts on sale for $5 I was all over that!

Supplies:
*T-Shirt
*Fabric Paint
*Scissors

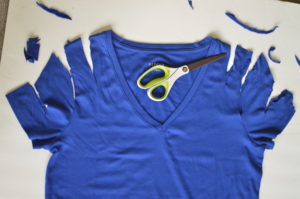
So I’ve been seeing all these cute cut sleeves all over Pinterest and I thought I would give it a try myself. I first started cutting the sleeve about 1 1/2 to 2 inches (down), then followed that by 2 more cuts.

Repeat on the other side. Here’s what I learned, material matters! I love a soft rayon shirt but I did discover that it shows every scissor cut. I needed to clean up my cuts at the end.

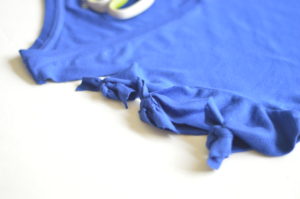
After all the cuts, begin tying each piece. You want to make sure you tie all pieces the same way, so the knots lay in a similar way.

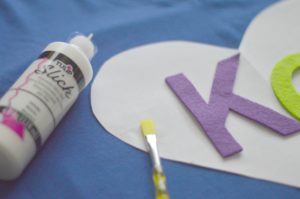
Next, I found a couple sticker letters I had laying around and whipped up a heart from scrap paper. After I traced the heart’s perimeter with the fabric paint I removed the heart. Then I peeled the stickers and placed them exactly in the center.
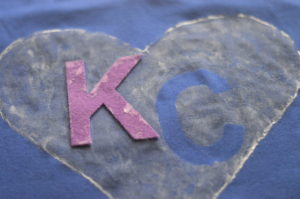
Using a paint brush, brush in outward motion. Overall, it gives the heart a weathered look- exactly what I’m going for.

Remove the stickers and you’re left with the negative space of the letters 🙂


Family Joy Blog Linky Party #58

I may be the only one, but I forgot about the time change! Thank goodness our phones change automatically. I really want to try and get the family outside today because it’s going to 85 degrees. Personally the pool sounds like the only place I want to be 🙂

Onto our party… do you have share buttons on your blog? I have visited multiple sites that I wanted to pin and share but there were no buttons or extensions. When you have good stuff, people want to share- so help us out 😉

family joy blog linky parties

Party invite(4) party hosts (2)

Charlene @ Thinking Outside The Pot: Facebook, Twitter, Instagram, Pinterest, Google +, Blog
Samantha @ Sammy Approves: Facebook, Twitter, Instagram, Pinterest, Google +, Blog
Cristina @ Ava’s Alphabet: Facebook, Twitter, Instagram, Pinterest, Google +, Blog
Charlotte @ Pursue Your Project: Facebook, Twitter, Instagram, Pinterest, Google +, Blog

Shamira @ Smiling Notes : Facebook, Twitter, Pinterest, Instagram, Blog

Melissa @ Mel Claire : Facebook, Pinterest, Twitter, Blog

Crystal @ Love Inspired Details : Facebook, Twitter, Pinterest, Instagram, Blog

Christene @ Keys To Inspiration : Facebook, Twitter, Pinterest, Instagram, Blog


recent joys #58


Thinking Outside The Pot: Money Saving Tips & Challenge
Sammy Approves: Tropical Punch Cream Cheese Fruit Dip
Ava’s Alphabet: Irish Soda Bread
Pursue Your Project: Instant Pot Taco Chicken Wings
Smiling Notes: 3-Ingredient Coffee Sugar Body Scrub

Mel Claire: St. Patrick’s Day Cream Cheese Filled Rainbow Cake
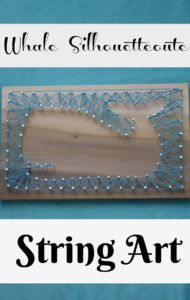
Love Inspired: Whale Silhouette String Art

Keys To Inspiration: How I Started My Blog


Features #58DIY Adulation: Easy DIY Shamrock Wreath
Simply September: Designing A Nursery With Paper Flowers
My Suburban Kitchen: Fudgy Rolo Brownies
Lolly Jane: St. Patrick’s Day Gumball Bracelets
Pillar Box Blue: Upcycle Your Jeans Into The Cutest Dog Toys

The Creative Household: Reuben Pinwheels

The Turquoise Home: Large DIY Wall Decor Ideas

Nap Time Creations: Spring Pom Pom Wreath


most clicked link #58


——–Crafting A Family: St. Patrick’s Day Good Luck Shamrock Printable——–


Thinking Outside The Pot
party rules


Save Save Save Save Save Save Save Save Save Save Save Save Save Save Save Save Save Save Save Save Save Save Save Save Save Save Save Save Save Save Save Save Save Save Save Save Save Save Save

Whale Silhouette String Art

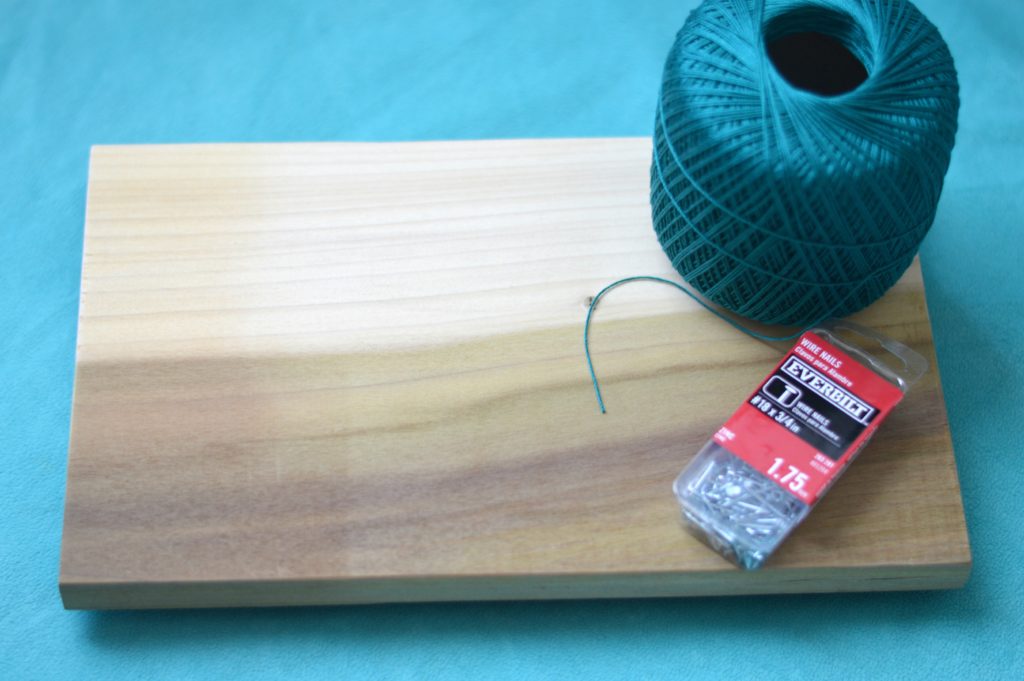
Let’s gather the supplies!

*Find a great piece of wood filled with character- cut to size (Lowe’s and Home Depot make cuts really cheap)

*Colored string

*Finishing nails, and a hammer

Step 1

Draw or print out a silhouette. Personally I think whales are easy enough to free hand, and have enough curves that you don’t have to be exact. I like to use my paper outline through out the whole project.

Step 2 

Grab the hammer and start hammering 1 nail at a time around the outline of the whale. You have a couple choices here, go visually or pencil a dot approximate the same distance for the entire outline. You just have to ask yourself, are you a perfectionist or a little more loosey goosey? 🙂

*An additional tip would be to pre-drill the holes so every nail goes in very straight- your call.

Step 3

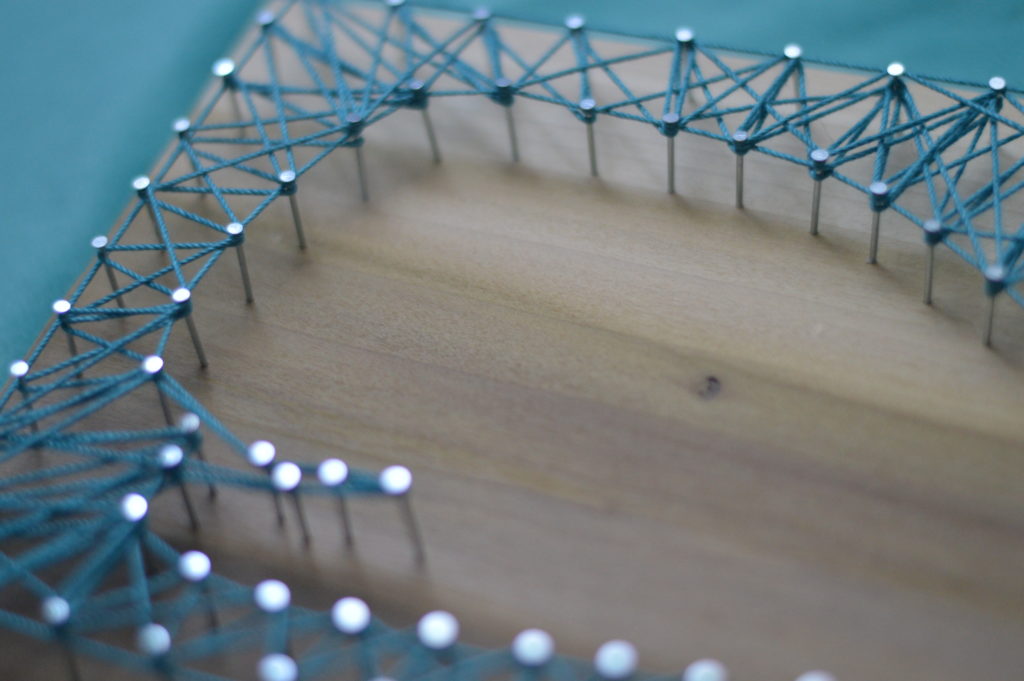
After the outline of the whale, hammer in the nails around the perimeter of the wood. Now comes the FUN part, the string! I like to start at the bottom corner and work my way around the entire perimeter first. Next, begin to cris-cross the string from the whale to the outside edge.
There’s really now wrong way because you’re the artist, you can constantly see how it’s coming together. If you don’t like the way a cris-crossed patterned turned out it, just redo it.

Since I’m making the nursery whale themed, this piece will fit in perfectly 🙂